In this tutorial, you will learn how to use Eclipse to create an Android JUnit Test Project, create automated unit tests and run them under a variety of conditions.
Before You Begin
The authors are assuming the reader has some basic knowledge of Android and have all of the tools such as Eclipse and the Android SDK installed and working. The examples given here are engineered to show how the Android JUnit framework can be used to test Android applications. Specifically, this tutorial will show you how to test aspects of an Activity and identify program errors. These errors are determined, but not addressed, as part of this tutorial.
Note: The code for the SimpleCalc application is available on Google Code as well as from the above link.
Step 1: Review the SimpleCalc Application
First, let’s take a few moments to look over the SimpleCalc application. It’s a very simple application with just one screen. The screen has two simple functions: it allows the user to input two values, adds or multiplies these values together and displays the result as shown below.

Step 2: Review the SimpleCalc Screen Layout
The SimpleCalc application has just one screen, so we have only one layout resource file called /res/layout/main.xml.
Here is a listing of the main.xml layout resource:- <?xml version="1.0" encoding="utf-8"?>
- <LinearLayout xmlns:android="http://schemas.android.com/apk/res/android"
- android:orientation="vertical" android:layout_width="fill_parent"
- android:layout_height="fill_parent">
- <TextView android:layout_width="fill_parent"
- android:layout_height="wrap_content" android:text="@string/hello"
- android:gravity="center_horizontal" android:textSize="48px"
- android:padding="12px" />
- <EditText android:layout_height="wrap_content" android:id="@+id/value1"
- android:hint="@string/hint1" android:inputType="numberDecimal"
- android:layout_width="fill_parent" android:textSize="48px"></EditText>
- <EditText android:layout_height="wrap_content" android:id="@+id/value2"
- android:hint="@string/hint2" android:inputType="numberDecimal"
- android:layout_width="fill_parent" android:textSize="48px"></EditText>
- <FrameLayout android:id="@+id/FrameLayout01"
- android:layout_width="wrap_content" android:layout_height="wrap_content"
- android:padding="12px" android:background="#ff0000">
- <LinearLayout android:id="@+id/LinearLayout02"
- android:layout_width="wrap_content" android:layout_height="wrap_content"
- android:orientation="horizontal" android:background="#000000"
- android:padding="4px">
- <TextView android:layout_width="wrap_content"
- android:layout_height="wrap_content" android:text="@string/resultLabel"
- android:textSize="48px" android:id="@+id/resultLabel"></TextView>
- <TextView android:layout_width="wrap_content"
- android:layout_height="wrap_content" android:id="@+id/result"
- android:textSize="48px" android:textStyle="bold"
- android:layout_marginLeft="16px"></TextView>
- </LinearLayout>
- </FrameLayout>
- <LinearLayout android:id="@+id/LinearLayout03"
- android:layout_height="wrap_content" android:layout_width="fill_parent">
- <Button android:layout_height="wrap_content" android:id="@+id/addValues"
- android:text="@string/add" android:textSize="32px"
- android:layout_width="wrap_content"></Button>
- <Button android:layout_height="wrap_content" android:id="@+id/multiplyValues"
- android:text="@string/multiply" android:textSize="32px"
- android:layout_width="wrap_content"></Button>
- </LinearLayout>
- </LinearLayout>
This layout is fairly straightforward. The entire content of the screen is stored within a LinearLayout, allowing the controls to display one after another vertically. Within this parent layout, we have the following controls:
- A TextView control displaying the header “Unit Testing Sample.”
- Two EditText controls to collect user input in the form of two numbers.
- A FrameLayout control which contains a horizontal LinearLayout with the result label TextView and resulting sum or product TextView. The FrameLayout displays a red border around these controls, highlighting the result.
- Finally, another horizontal LinearLayout with two child controls: a Button control for addition and a Button control for multiplication.
This layout is designed to look right in the Android Layout Designer when the Nexus One option (which has a screen size of 800×480) is chosen in both portrait and landscape modes. You’ll soon see that this is not a bullet-proof way of designing layouts. As with the code you’ll see in the next step, it isn’t designed to work perfectly.
Step 3: Review the SimpleCalc Activity
The SimpleCalc application has just one screen, so we have only one Activity as well: MainActivity.java. The MainActivity.java class controls the behavior of the one screen, whose user interface is dictated by the main.xml layout.
Here is a listing of the MainActivity.java class:
- package com.mamlambo.article.simplecalc;
- import android.app.Activity;
- import android.os.Bundle;
- import android.util.Log;
- import android.view.View;
- import android.view.View.OnClickListener;
- import android.widget.Button;
- import android.widget.EditText;
- import android.widget.TextView;
- public class MainActivity extends Activity {
- /** Called when the activity is first created. */
- @Override
- public void onCreate(Bundle savedInstanceState) {
- final String LOG_TAG = "MainScreen";
- super.onCreate(savedInstanceState);
- setContentView(R.layout.main);
- final EditText value1 = (EditText) findViewById(R.id.value1);
- final EditText value2 = (EditText) findViewById(R.id.value2);
- final TextView result = (TextView) findViewById(R.id.result);
- Button addButton = (Button) findViewById(R.id.addValues);
- addButton.setOnClickListener(new OnClickListener() {
- public void onClick(View v) {
- try {
- int val1 = Integer.parseInt(value1.getText().toString());
- int val2 = Integer.parseInt(value2.getText().toString());
- Integer answer = val1 + val2;
- result.setText(answer.toString());
- } catch (Exception e) {
- Log.e(LOG_TAG, "Failed to add numbers", e);
- }
- }
- });
- Button multiplyButton = (Button) findViewById(R.id.multiplyValues);
- multiplyButton.setOnClickListener(new OnClickListener() {
- public void onClick(View v) {
- try {
- int val1 = Integer.parseInt(value1.getText().toString());
- int val2 = Integer.parseInt(value2.getText().toString());
- Integer answer = val1 * val2;
- result.setText(answer.toString());
- } catch (Exception e) {
- Log.e(LOG_TAG, "Failed to multiply numbers", e);
- }
- }
- });
- }
- }
As you can see, the Java for this class is quite straightforward. It simply implements onClick() handlers for both the addition and multiplication Button controls.
When a Button is pressed, the Activity retrieves the values stored in the two EditText controls, calculates the result, and displays it in the TextView control called R.id.result.
Note: There are bugs in this code! These bugs have been designed specifically to illustrate unit testing.
Step 4: Creating an Android Test Project
You can add a test project to any Android project in two ways. You can add a test project while creating a new Android project with the Android Project Wizard or you can add a test project to an existing Android project. (The steps are basically the same.)
For this example, we have an existing project. To add a test project to the SimpleCalc project in Eclipse, take the following steps:
From the Project Explorer, choose the Android project you wish to add a test project to. Right-click on the project and choose Android Tools->New Test Project…

Step 5: Configuring the Android Test Project
Now you need to configure the test project settings, including the test project name, file location, Android project to test and build target (SDK version).
For this example, we can use the following settings:
- Test project names generally end in “Test”, so let’s name this test project SimpleCalcTest
- The project location can be wherever you normally store source files on your hard drive.
- Choose the Android project to test: SimpleCalc
- The appropriate build target will be selected automatically once you select the project to test. In this case, since the Android project is built for Android 2.1 + Google APIs (API Level 7), it makes sense to use the same build target for the test project.
- It makes sense to name the test project accordingly: SimpleCalcTest, with the appropriate package name suffix simplecalc.test.

Hit Finish.
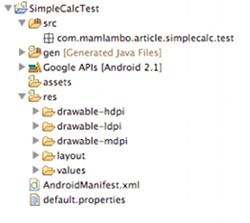
Step 6: Review the SimpleCalcTest Project
The SimpleCalcTest project is an Android project. You will notice that it has all the normal things you’d expect of an Android project, including a Manifest file and resources.
Step 7: Determine Unit Tests for the SimpleCalc Application
Now that you have a test project configured for the SimpleCalc application, it makes sense to determine some reasonable unit tests for the application.
Many software methodologies these days work compatibly with unit testing. Unit tests can greatly increase the stability and quality of your application and reduce testing costs. Unit tests come in many forms.
Unit tests can:
- Improve testing coverage
- Test application assumptions
- Validate application functionality
Unit tests can be used to test core functionality, such as whether or not the SimpleCalc math is being performed correctly. They can also be used to verify if the user interface is displaying correctly. Now let’s look at some specific test cases.
Step 8: Create Your First Test Case
To create your first test case, right-click on the simplecalc.test package and choose New->JUnit Test Case.

Step 9: Configure Your First Test Case
Now you need to configure the test case settings.
For this example, we can use the following settings:
- Both JUnit 3 and 4 are supported. We’ll use the default JUnit 3 here.
- The source folder should be the location of the SimpleCalcTest project files.
- The package should be the package name of the SimpleCalcTest project.
- In this case, we will name the test case MathValidation.
- For the SuperClass, choose "android.test.ActivityInstrumentationTestCase2." This is the test case you use for testing activities.
- Check the boxes to add method stubs for setUp() and constructor.

Hit Finish. (You can safely ignore the warning saying, “Superclass does not exist.”)
Step 10: Review the MathValidation Test Case
The MathValidation.java test case source file is then created.
The lifecycle of a test case is basically this: construction, setUp(), tests run, tearDown(), and destruction. The setUp() method is used to do any general initialization used by all of specific tests. Each test to be run in the test case is implemented as its own method, where the method name begins with “test”. The tearDown() method is then used to uninitialize any resources acquired by the setUp() method.
- package com.mamlambo.article.simplecalc.test;
- import android.test.ActivityInstrumentationTestCase2;
- public class MathValidation extends
- ActivityInstrumentationTestCase2<MainActivity> {
- public MathValidation(String name) {
- super(name);
- }
- protected void setUp() throws Exception {
- super.setUp();
- }
- }
Now it’s time to implement the MathValidation Test Case
Step 11: Modify the MathValidation Class Constructor
First, modify the MathValidation class constructor. This constructor ties configures the internals of the Android test superclass we’re using.
- public MathValidation() {
- super("com.mamlambo.article.simplecalc", MainActivity.class);
- }
Step 12: Implement the MathValidation setUp() method
Now you need to gather the data required for validating the SimpleCalc math calculations. Begin by implementing the setUp() method. You can retrieve the Activity being tested using the getActivity() method as follows:
- MainActivity mainActivity = getActivity();
Next, you need to retrieve an instance of the TextView control called R.id.result. This is the control that will hold the resulting sum or product from the math calculations used by the application.
The full updated code listing (MathValidation.java) with these modifications is shown below:
- package com.mamlambo.article.simplecalc.test;
- import android.test.ActivityInstrumentationTestCase2;
- import android.widget.TextView;
- import com.mamlambo.article.simplecalc.MainActivity;
- import com.mamlambo.article.simplecalc.R;
- public class MathValidation extends ActivityInstrumentationTestCase2<MainActivity> {
- private TextView result;
- public MathValidation() {
- super ("com.mamlambo.article.simplecalc", MainActivity.class);
- }
- @Override
- protected void setUp() throws Exception {
- super.setUp();
- MainActivity mainActivity = getActivity();
- result = (TextView) mainActivity.findViewById(R.id.result);
- }
- }
Step 13: Consider Tests for the SimpleCalc Application
Now that everything is set up, what tests do you want to perform? Let’s begin by checking the math used by the SimpleCalc application. Specifically, let’s check that the numbers are retrieved correctly, as well as added and multiplied correctly. Did we set the right types for our number values? Are we retrieving and performing mathematical calculations using the correct types?
To answer these questions, we must add some testing code to the MathValidation class. Each specific test will have it’s own method beginning with “test” – the “test” method name prefix is case sensitive! This naming scheme is how JUnit determines what methods to run.
Step 14: Implement a Method to Test SimpleCalc’s Addition
Let’s begin by testing the addition calculation of SimpleCalc. To do this, add a method called testAddValues() to the MathValidation class.
This test will enter two numbers (24 and 74) into the screen and press Enter, which acts as a click on the first Button control which is in focus. Then it will retrieve the sum displayed by the application in the result TextView control and test to see if the result is the expected one (98).
To supply the EditText controls with two numbers to sum, use the sendKeys() method. This method mimics how keys are sent to Android applications. If you use the setText() method of the EditText control to set the text in each control, then you are bypassing the validation of the numeric entry that user’s would encounter. This method of providing key strokes assumes that the focus starts on the first control and that using the Enter key goes to the next one (you’ll see that the enter key is sent at the end of each number). If neither of those assumptions is true, the test will also fail. This is not a bad thing, but it might be failing for the wrong reasons (e.g. focus or layout issues, rather than math issues).
Finally, you use the assertTrue() method to compare the actual result displayed on the screen to the expected result. ). We compare against a string, since the result is displayed as a string. This way, we can also make sure we don’t duplicate any math or type errors in the application logic within the test framework.
Here is the full listing of the testAddValues() method:
Here is the full listing of the testAddValues() method:
- private static final String NUMBER_24 = "2 4 ENTER ";
- private static final String NUMBER_74 = "7 4 ENTER ";
- private static final String ADD_RESULT = "98";
- public void testAddValues() {
- sendKeys(NUMBER_24);
- // now on value2 entry
- sendKeys(NUMBER_74);
- // now on Add button
- sendKeys("ENTER");
- // get result
- String mathResult = result.getText().toString();
- assertTrue("Add result should be 98", mathResult.equals(ADD_RESULT));
- }
Congratulations! You’ve created your first test!
Step 15: Enhancing the Tests for Addition
Now let’s add a few more tests to make sure all different types of numbers can be added, resulting in the display of the proper sum.
Because the activity is launched for each test, you do not need to clear the values or anything like that between tests. You also do not need to change the focus within the form, since it begins at value1. Therefore, you can simplify tests by concatenating key presses together in a single sendKeys() method call, like such:
- sendKeys(NUMBER_24 + NUMBER_74 + "ENTER");
For example, here is the code for the testAddDecimalValues() method, which tests the addition of a decimal value 5.5 with the number 74, which should result in 79.5:
- public void testAddDecimalValues() {
- sendKeys(NUMBER_5_DOT_5 + NUMBER_74 + "ENTER");
- String mathResult = result.getText().toString();
- assertTrue("Add result should be " + ADD_DECIMAL_RESULT + " but was "
- + mathResult, mathResult.equals(ADD_DECIMAL_RESULT));
- }
Similarly, you can perform a test of adding a negative number -22 to the number 74, which should result in a sum of 52. This test is implemented in the testSubtractValues() method, as follows:
- public void testAddDecimalValues() {
- sendKeys(NUMBER_5_DOT_5 + NUMBER_74 + "ENTER");
- String mathResult = result.getText().toString();
- assertTrue("Add result should be " + ADD_DECIMAL_RESULT + " but was "
- + mathResult, mathResult.equals(ADD_DECIMAL_RESULT));
- }
Step 16: Implement a Method to Test SimpleCalc’s Multiplication
It should be quite straightforward to implement a similar test for SimpleCalc’s multiplication called testMuliplyValues().
The only tricky part is that the Multiply Button control is not in focus when we’re done entering the numbers (instead, the Add Button is).
You might think to just call the requestFocus() method on the multiply button. Unfortunately, this won’t work because requestFocus() has to be run on the UI thread in Android. Running methods on the UI Thread can be done as part of a test case, but it’s done asynchronously so you can’t guarantee when it will be complete.
You might think to just call the requestFocus() method on the multiply button. Unfortunately, this won’t work because requestFocus() has to be run on the UI thread in Android. Running methods on the UI Thread can be done as part of a test case, but it’s done asynchronously so you can’t guarantee when it will be complete.
Instead, we’ll again use the sendKeys() method. Since we defined the Multiply Button to always display to the right of the Add Button, we can just send the “DPAD_RIGHT” key followed by “ENTER” to click the Multiply Button.
- public void testMultiplyValues() {
- sendKeys(NUMBER_24+NUMBER_74+ " DPAD_RIGHT ENTER");
- String mathResult = result.getText().toString();
- assertTrue("Multiply result should be " + MULTIPLY_RESULT + " but was "
- + mathResult, mathResult.equals(MULTIPLY_RESULT));
- }
As an exercise, you might try adding more multiplication tests with various sizes of numbers. Try to engineer a test that might fail with the existing code. Can you guess if each test will be successful or not? (Hint: Look at the type of the variable that the string is being converted to.)
Step 17: Running Unit Tests with the Android Emulator or Device
Unit test frameworks such as the one you’re building are Android applications like any other. They must be installed on the emulator or device you wish to test, along with the application to be tested (in this case, SimpleCalc).
To run the unit tests you have created so far from Eclipse, choose the Debug drop down, then Debug As, then Android JUnit Test. Make sure the file you just created is the active file (shown in the window) as that is the test case that will be launched.

Step 18: Examining the Test Results
The tests may take some time to complete, especially if the emulator was not already running. When the tests have completed, you should see results similar to those shown here:

You’ll notice that all four of the tests you’ve just created run. Two of them are successful, while two of them have failed. Do you know why they’ve failed? (Fixing these calculation bugs is left as a learning exercise for the reader.)
Besides successful tests and failed tests, errors are also shown. A failure is when a tested for assertion fails. An error, on the other hand, is a thrown exception. Errors can either be untested for edge cases or simply mistakes in the testing code. If you have errors, check your testing code carefully to make sure it is working correctly.
Step 19: Create a Test Case for Screen Display Testing
Unit tests need not be limited to validating core functionality such as the addition and multiplication of values. Tests can also validate whether or not a screen layout is displayed properly.
For example, you might want to validate that all of the layout controls display properly on all target screens. The SimpleCalc’s screen was designed in the layout designer in Eclipse for an 800x480 screen in either landscape or portrait mode, but will it work on other screen sizes and devices? Were we then too specific in our design? Automated testing can tell us the answer to this question very quickly.
To create another test case, right-click on the SimpleCalc.Test package and choose New->JUnit Test Case. Call this new test LayoutTests. Configure this test case much as you did the MathValidation class in Step 8.

Hit Finish.
Step 20: Review and Update the LayoutTests Test Case
The LayoutTests.java test case source file is then created. Modify the class to look like the code listing below, modifying the constructor, retrieving the Button controls and the layout as a whole:
- package com.mamlambo.article.simplecalc.test;
- import android.test.ActivityInstrumentationTestCase2;
- import android.view.View;
- import android.widget.Button;
- import com.mamlambo.article.simplecalc.MainActivity;
- import com.mamlambo.article.simplecalc.R;
- public class LayoutTests extends ActivityInstrumentationTestCase2<MainActivity> {
- private Button addValues;
- private Button multiplyValues;
- private View mainLayout;
- public LayoutTests() {
- super("com.mamlambo.article.simplecalc", MainActivity.class);
- }
- protected void setUp() throws Exception {
- super.setUp();
- MainActivity mainActivity = getActivity();
- addValues = (Button) mainActivity.findViewById(R.id.addValues);
- multiplyValues = (Button) mainActivity
- .findViewById(R.id.multiplyValues);
- mainLayout = (View) mainActivity.findViewById(R.id.mainLayout);
- }
- }
Now let’s implement some specific tests for LayoutTests.Step 20: Consider Layout Tests for the SimpleCalc Application
Now that everything is set up, what tests do you want to perform? One common bug in application design is for controls not to display properly in all screen sizes and orientations. Therefore, it makes sense to try to build a test case to verify the location of certain controls. You can then add other checks to make sure other View controls display and behave appropriately.
Now that everything is set up, what tests do you want to perform? One common bug in application design is for controls not to display properly in all screen sizes and orientations. Therefore, it makes sense to try to build a test case to verify the location of certain controls. You can then add other checks to make sure other View controls display and behave appropriately.
Step 21: Implement a Method to Test Button Display
Let’s begin by testing that the Add Button control of the SimpleCalc screen is visible. To do this, add a method called testAddButtonOnScreen() to the LayoutTests class.
This test checks to see if the Add Button control is displayed within the visible rectangle representing the overall screen size.
To implement the testAddButtonOnScreen() method, you must first determine the screen size. There are a number of ways to do this. One simple way is to retrieve the View that represents the entire screen layout and use the getWidth() and getHeight() methods. Doing this also takes in to account any screen real estate being used by other items, such as the title bar or information bar that are often at the top of an Android screen.
Determining whether or not the Add Button control is drawn within those bounds is as simple as comparing the layout bounds to the bounds of the drawing rectangle for the Add Button control.
Here is the full listing of the testAddButtonOnScreen() method:
- public void testAddButtonOnScreen() {
- int fullWidth = mainLayout.getWidth();
- int fullHeight = mainLayout.getHeight();
- int[] mainLayoutLocation = new int[2];
- mainLayout.getLocationOnScreen(mainLayoutLocation);
- int[] viewLocation = new int[2];
- addValues.getLocationOnScreen(viewLocation);
- Rect outRect = new Rect();
- addValues.getDrawingRect(outRect);
- assertTrue("Add button off the right of the screen", fullWidth
- + mainLayoutLocation[0] > outRect.width() + viewLocation[0]);
- assertTrue("Add button off the bottom of the screen", fullHeight
- + mainLayoutLocation[1] > outRect.height() + viewLocation[1]);
- }
At this point, you can see how you could also test the display of the Multiply Button, or the Result text, or any other control on the SimpleCalc screen.
Step 22: Running the LayoutTests Test Case
In order for layout testing to provide useful results, we can’t just run the test once. Instead, the tests must be run on multiple emulator configurations and screen orientations. This is different from the logic tests of above where a messy layout or a layout that doesn’t match the design pattern doesn’t necessarily impede functionality.
For example, if you create emulator configurations (using AVDs) for the following configurations, the LayoutTests test case will yield the following results:
- 480x800, portrait mode (will pass)
- 800x480, landscape mode (will fail)
- 320x480, portrait mode (will fail)
- 480x320, landscape (will fail)
- 480x854, portrait mode (will pass)
- 854x480, landscape mode (will fail) Can you figure out why it fails in all landscape modes, but draws fine in the creator for the landscape mode (#2 above)?
Can you figure out why it fails in all landscape modes, but draws fine in the creator for the landscape mode (#2 above)?
Hint: What’s shown on the screen when the application actually runs (see the figure below)?

Step 23: Where to Go From Here
Now that you have some tests in place—some of which pass and some of which fail—you can imagine how unit testing can improve the quality of your application.
The more thorough you are with your unit testing coverage, the better. You’ve seen how unit testing can uncover bugs in code and layout designs. The next step would be to identify the failure points and fix those bugs. Once you’ve fixed the bugs, you should re-run the unit tests to ensure that they pass in all test cases.
Conclusion
In this tutorial, you learned how to create unit tests using the Android JUnit framework for your Android projects. You also learned how to create different kinds of unit tests to test a variety of application features, including underlying program functions as well as display characteristics.
We hope you enjoyed this tutorial and look forward to your feedback!
Nice tutorial
ReplyDelete